A backyard putting green is one of the few home projects that pays you back every single evening you’re home. It’s also one of the most over-complicated by the internet. Strip it down and it’s five steps, and the only one that’s hard to fix later is the base. I sell the turf, the sand, and the cups for these greens all the time, so here’s the honest build — what matters, what doesn’t, and where the patience actually goes.
TL;DR — Quick Answer
Building a backyard putting green is five steps: plan the size and shape, excavate and compact a crushed-aggregate base, lay and seam the putting green turf, infill with sand and brush for speed, then cut the cups and set the flags. The base is the whole game — a green only rolls true over a firm, smooth, well-graded foundation. A typical backyard green runs 100 to 400 square feet and is a realistic weekend DIY if you respect the base.
Typical size
100 to 400 sq ft
Hardest step
The base
Turf price
$1.99 / sq ft at the yard
Speed comes from
Sand infill + rolling
Planning a Green?
Tell us your square footage and how many holes you want. We'll spec the turf, base, sand, and cups — and give you the material price straight.
Table of Contents
Key Takeaways
- A putting green is five steps, and the base is the only one you can't fix later — build your contours into the base, not on top of it.
- Most backyard greens run 100 to 400 square feet; pick the size by the shots you want, not by a rule.
- Speed comes from sand infill and rolling, plus the turf's pile density — not from anything you do to the blades.
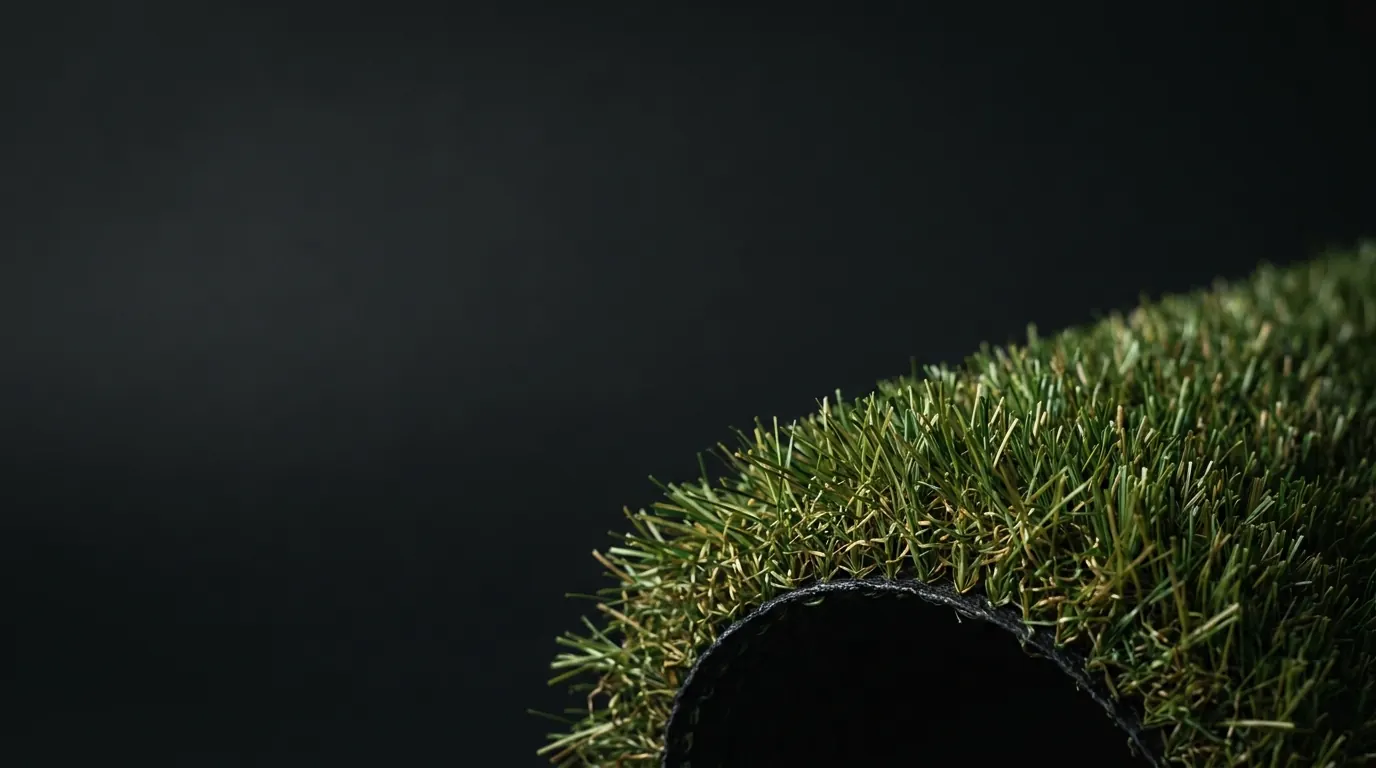
- Putting green turf is its own product at $1.99 a square foot — short, dense, and directional, not landscape turf cut short.
How to Build a Backyard Putting Green
Five steps, in order. The middle three are a weekend; the first and last are an afternoon each.
-
 1
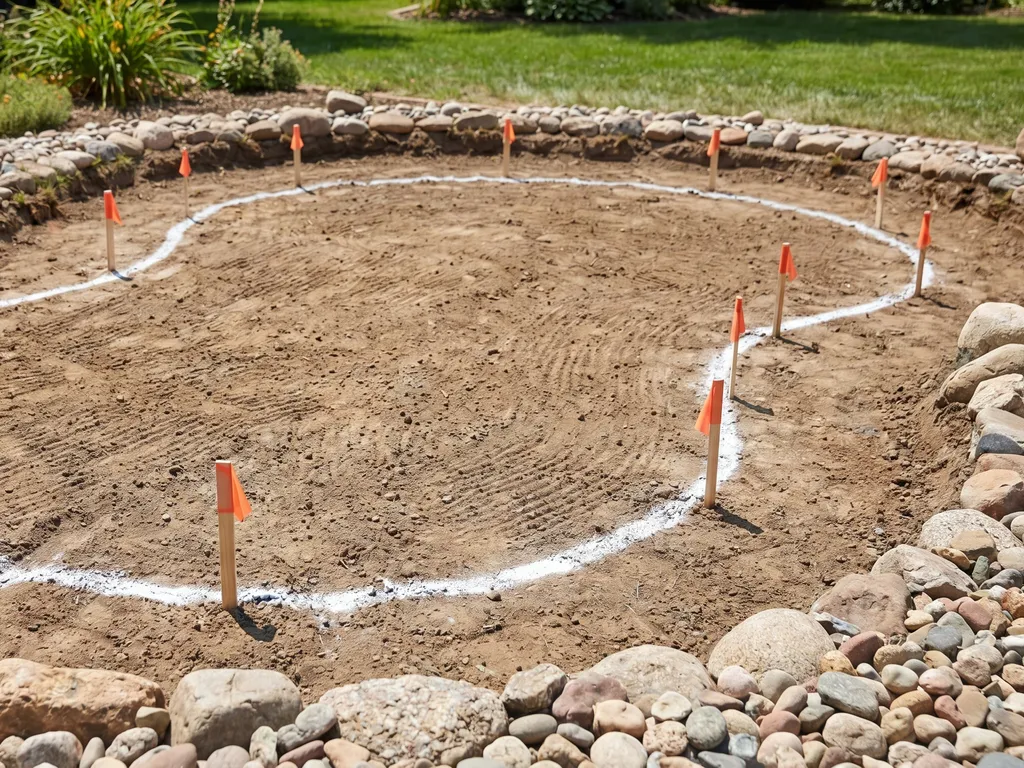
1 Plan the Size and Shape
Mark the outline and contours with paint and stakes. Decide cups, breaks, and a chipping fringe before you dig.
-
 2
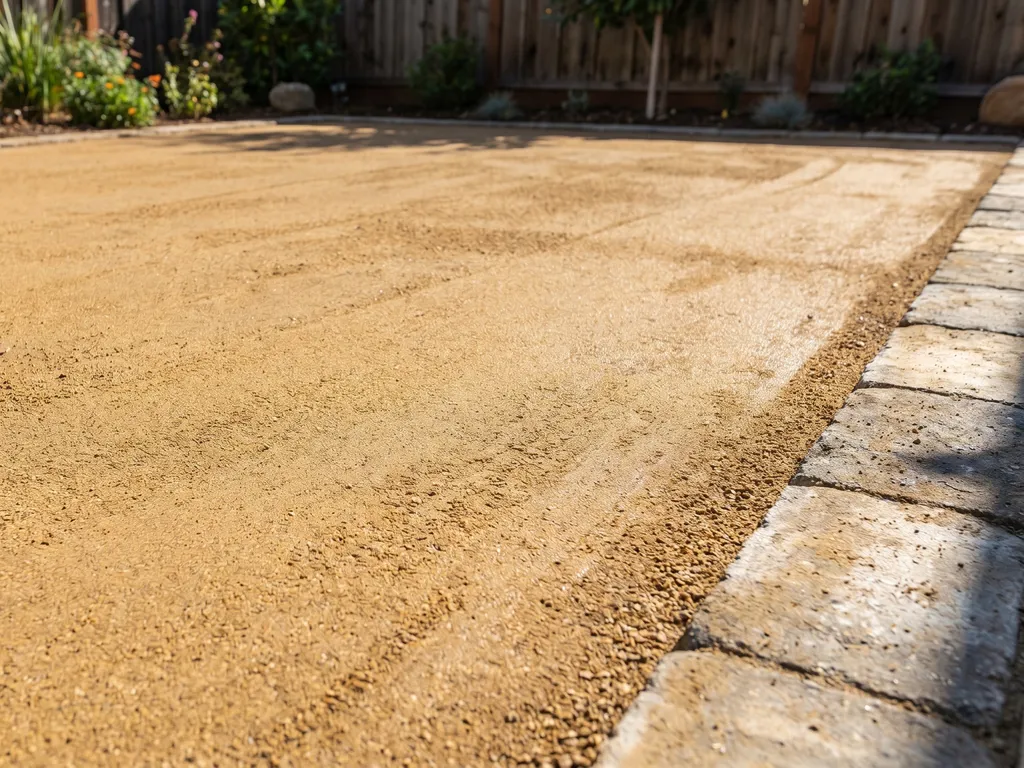
2 Excavate and Build the Base
Dig down a few inches, lay crushed aggregate, grade your contours, and compact it firm and smooth in lifts.
-
 3
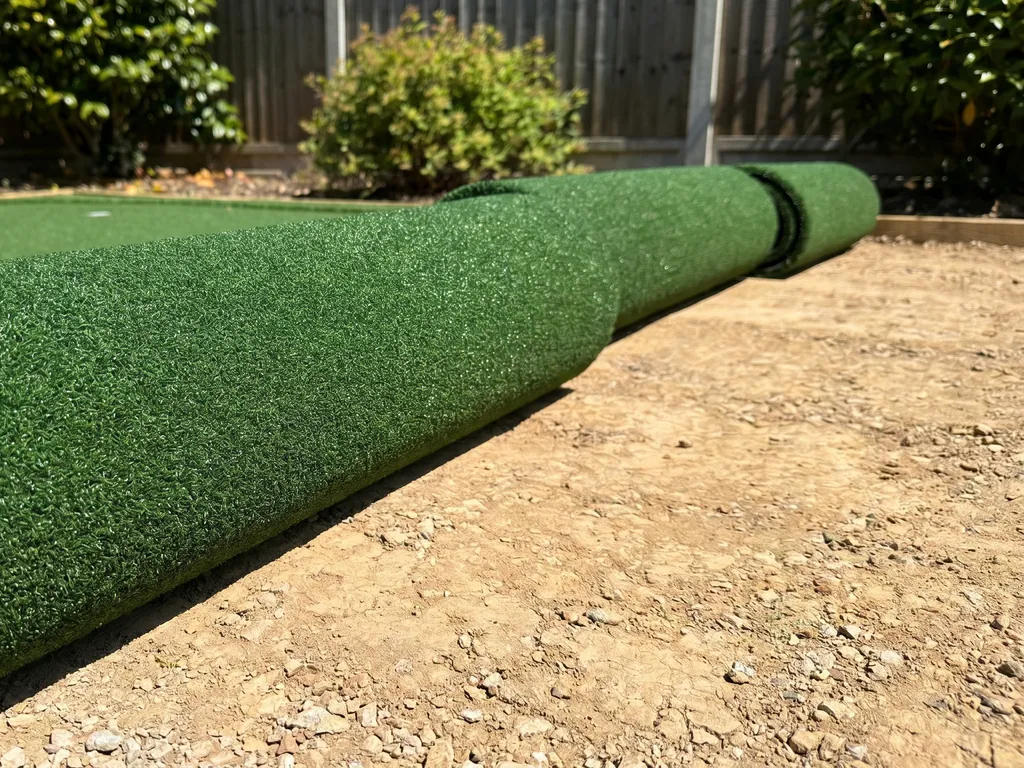
3 Lay and Seam the Turf
Roll the putting green turf out, let it relax, cut to shape, and glue the seams with turf tape and adhesive.
-
 4
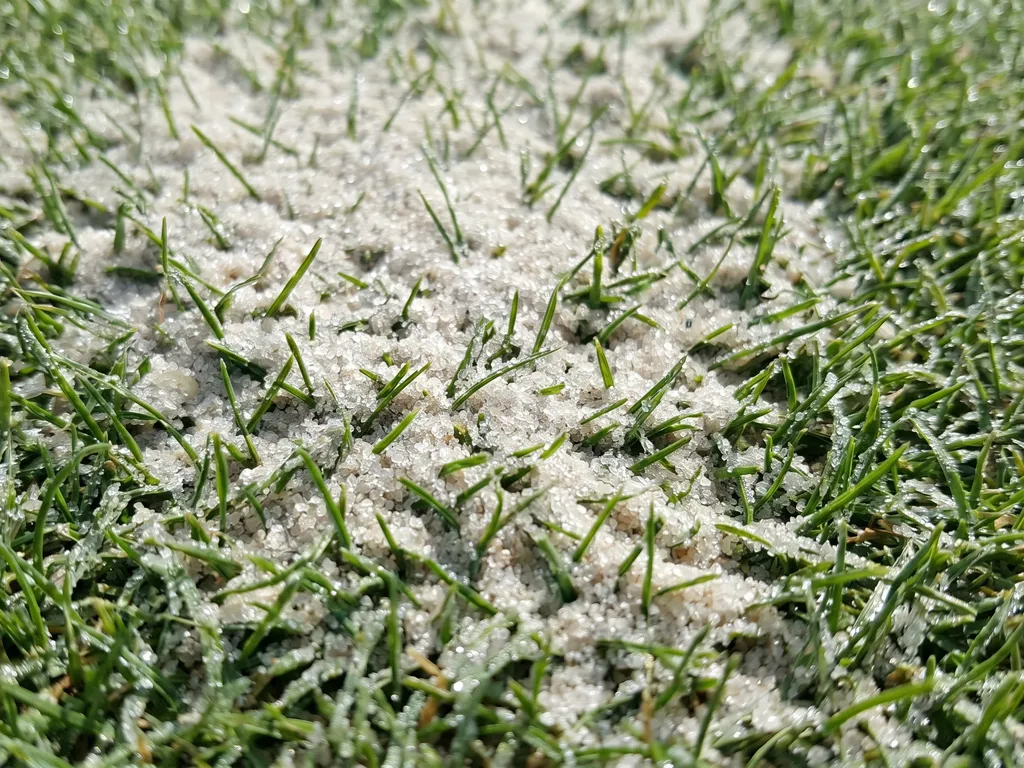
4 Infill and Brush for Speed
Broadcast silica sand, brush it deep into the pile, and roll the surface. More sand and rolling means a faster roll.
-
 5
5 Cut the Cups and Finish
Cut the cup holes, set the cups flush, drop in the flags, and trim the fringe. Then go make a putt.
A note on order: plenty of builders cut the cup holes right after laying the turf and before the final infill pass. Either works. The cups and the last sand brushing are the fiddly finish work, so I group them at the end. The whole turf side of this mirrors a standard install — our DIY turf install guide covers seaming, gluing, and nailing in more depth.
How Big Should a Backyard Putting Green Be?
There’s no magic number, but here’s the honest range. A 100-to-150-square-foot green fits two or three cups and a short chip — enough to actually practice, small enough to tuck into a side yard. Push to 300 or 400 square feet and you get real breaks, longer putts, and room for multiple holes and a chipping fringe.
Curves and undulations make a green more fun and more challenging. They also add seams, cuts, and base-shaping labor, so a kidney-shaped green with two tiers is a bigger job than a simple oval. If it’s your first build, a simple shape with one gentle break is plenty. Green speed itself is measured with a device called the Stimpmeter, which is worth knowing about before you go chasing a faster surface.
The Base Is Everything
If you take one thing from this, take this: the green is only as true as the base under it. Every soft spot, every high point, every lazy bit of grading shows up in the roll, and you can’t sand your way out of a bad base.
Build it from a compacted crushed aggregate — a road base topped with a finer crusher-fine or decomposed granite — graded to the contours you want and compacted firm in lifts. The contours have to live in the base; you can’t add a break on top of flat ground with turf and sand. University turf programs that study green construction, like the University of Arkansas Cooperative Extension, all land in the same place — the foundation determines the surface. In Arizona that means digging through caliche; in Utah it means a base that drains through freeze-thaw. If you’re sizing base material, our sub-base turf calculator does the tonnage.
What It Costs to Build
The material side is straightforward and a lot less than most people expect, because you’re not paying an installed markup. Here’s the rough breakdown for a mid-size DIY green.
| Item | What it is | Notes |
|---|---|---|
| Putting green turf | The short, dense, directional surface | $1.99 / sq ft at the yard, contractor pricing for everyone |
| Base aggregate | Crushed road base + crusher-fine | A few tons for a typical green; price varies by haul |
| Silica sand infill | Brushed in for speed and stability | More sand equals a faster, firmer roll |
| Cups, flags & nails | The finish hardware | Putting green nails run a small box; cups are inexpensive |
Materials only — labor is the big variable if you hire it out. A DIY green is a fraction of an installed one.
Run your exact square footage through the turf calculator for a real materials number, and browse the putting green turf product for the surface itself.
Cheaping out on the base
The number one regret. A bumpy base makes a bumpy roll, and no amount of turf or sand fixes it. Spend your patience here.
Using landscape turf
A lawn roll cut short is too tall and soft to putt on. Putting green turf is a different, denser, directional product.
Skipping the sand infill
The sand is what stands the blades up and sets the speed. A green with no infill plays slow and dead.
Adding contours on top
Breaks have to be built into the base. You can't lay a slope over flat ground with turf and hope it rolls.
Build It With the Right Turf
We supply putting green turf, base, sand, cups, and a straight answer on what your green needs. Grab a sample and a plan.
- 4.9 from 300+ reviews
- 12-year manufacturer warranty
- Arizona & Utah
What Customers Say
4.9 from 300+ verified Google reviews
Best service. Lush 70 is great quality. Thanks for the great quality turf for my new home. The Turf Yard is amazing!
Best turf around! Look no further. I have had several purchase from the turf yard. Lush 80 and Lush 70 are very great products. Thanks to them my projects turn out great every time!
Expert Tips
— Bennett Brown, Co-Founder
Spend Your Time on the Base
Eighty percent of a green's quality is the base. If you rush one part, don't let it be the grading and compaction.
Buy the Putting Green Product, Not Lawn Turf
It's short, dense, and directional for a reason. Landscape turf cut down will never roll true.
Dial Speed With Sand and a Roller
Want it faster? Add sand, brush it deep, and roll it firm. That's the lever — not the blade.
Build the Breaks Into the Ground
Contours come from shaping the base. Decide your slopes before you compact, because after that they're set.
Add a Chipping Fringe
A ring of slightly longer turf around the green lets you practice short chips and frames the whole thing. It's a small add with a big payoff.
— Bennett Brown, Co-Founder
Related Services
So that’s a backyard putting green, start to flag, without the internet’s complications. We supply the turf, base guidance, sand, and cups across the Arizona service area from our Mesa yard and across Utah from Provo, at contractor pricing for everyone. Swing by, grab a putting green sample, and call Mesa at (480) 910-2440 or Provo at (385) 335-9042. We’ll help you size it, spec the base, and price it — and then the only excuse left for missing the putt is you.